How to Change Engine Oil Filters
Regular oil filter changes are essential for the health, efficiency, and longevity of the engine. With the right equipment, procedures, and safety precautions, you can confidently change filters and keep your equipment’s oil system in optimal condition.
The Importance of a Quality Filter
Before we grab the tools, we need to be clear on why this task matters so much. A simple canister of metal and paper is one of the most important guardians of your engine’s health. Choosing and changing a quality oil filter is not just routine maintenance; it’s a strategic defense for your investment.
Best Machinery Equipment Protection
Firstly, the basic job of an oil filter is to remove harmful particles. In the conditions where off-road equipment works, a high volume of abrasive material like dust, dirt, and silica is always an issue. The engine can also develop tiny metal particles from normal wear and soot in the combustion process. A good filter will catch those pollutants and prevent them from wearing out sensitive components. Bearings, camshafts, and turbochargers can all be destroyed when small particles begin grinding away at them.
Continued Engine Performance
All of the equipment needs a steady, high-volume flow of clean oil to run properly. Over time, the filter cannot provide that flow when it is clogged. The engine’s bypass valve could even open, and the oil would leave the filter unfiltered, just to maintain pressure. That unfiltered oil will quickly wear your engine, causing it to overheat and lose power that can easily be felt by the operator. A fresh filter will give your engine that clean oil flow it needs to work at its maximum performance levels.
Long-Term Savings
A filter is cheap. An engine is not. Through preventing accelerated wear, your filter is directly and inexpensively keeping your engine alive and pushing expensive overhauls into the future. A healthy, well-oiled engine will also save you money by running more efficiently, decreasing your fuel costs well into the future.
How to Change an Oil Filter on an Engine
Replacing the oil filter on a 20-ton excavator isn’t like doing so on a passenger car. The parts are bigger, the fluid quantities are greater and the need for precision is just as great. We’ve broken the process down into digestible chunks.
Tools and Materials Needed
Having everything on hand before the job starts makes it go faster, safer and cleaner. Here’s what you’ll need:
- Heavy-Duty Oil Filter Wrench: This could be a strap-style, cap-style or pliers-style wrench. Just make sure it is big enough and strong enough for the filter in your particular machine.
- Wrench/Socket Set: To remove the engine oil drain plug.
- Torque Wrench: To tighten the drain plug to the manufacturer’s specification, so it won’t leak or damage the plug and/or pan.
- Large Oil Drain Pan: Heavy equipment engines hold gallons of oil. Make sure your pan has more than enough capacity.
- Funnel: To cleanly refill the engine with new oil.
- Personal Protective Equipment (PPE): Safety glasses and heavy-duty gloves are essential.
Step-by-Step Guide
Follow these steps for a professional-grade filter change.
Prepare the Machine
Start the engine and let it run for 5-10 minutes. This warms the oil, lowers its viscosity (making it flow out faster), and suspends contaminants so they drain out with the oil. Then, park the machine on level ground and shut it down.
Drain the Engine Oil
Place your large drain pan under the engine’s oil pan. Locate the drain plug, which is a large bolt at the bottom of the pan. Use the correct size wrench or socket to loosen and remove the plug. The oil will drain out quickly and in large volume, so be prepared.
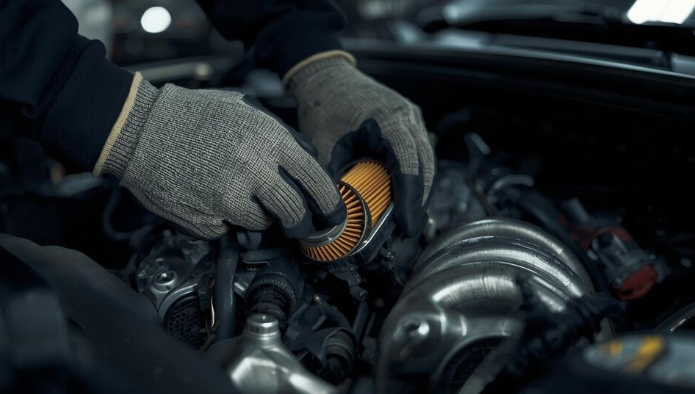
Remove the Old Filter
As the oil drains, move a secondary pan or your main pan directly under the old oil filter. Using your filter wrench, turn the filter to loosen it. Once it’s loose, you should be able to unscrew it the rest of the way by hand. The filter will be heavy and full of oil, so maintain a firm grip. Carefully lower it and place it in the drain pan.
Clean the Mounting Surface
This is a critical step. Take a clean rag and wipe the filter mounting surface on the engine block. Make sure the old rubber gasket came off with the old filter. If a piece of the old gasket remains stuck to the engine, the new filter will not seal properly and will cause a massive oil leak.
Prepare and Install the New Filter
Take your new filter and dip a gloved finger into some new, clean engine oil. Lightly lubricate the rubber gasket on the top of the new filter. This helps create a perfect seal and prevents the gasket from twisting or tearing during installation. Carefully screw the new filter onto the mounting point by hand until the gasket makes contact.
Tighten the Filter
Follow the instructions printed on the side of the new filter. The standard procedure is to tighten it an additional three-quarters (3/4) to one full turn by hand after the gasket makes contact. Do not use the filter wrench to tighten it unless specifically instructed, as overtightening can damage the filter or gasket.
Replace the Drain Plug and Refill Oil
After the oil has all poured out, you should wipe off the drain plug and put it back in. It is best to use a torque wrench, setting it to the tightness shown in the owner’s manual. Next, you can remove the oil fill cap and pour in the proper amount of new oil using a funnel.
Perform Final Checks
Replace the oil fill cap. Start the car and let it run for one minute. Check if the oil pressure gauge is normal. While the car is running, look at the new filter for oil leaks. Also, look at the drain plug for leaks. Turn off the car and leave it alone for a few minutes. Check the oil level using the dipstick. Add more oil if the oil is not enough.
Properly Dispose of Used Materials
Pour the old oil from the pan into a container. You should bring old oil and filters to a recycling center or an auto parts store that accepts them.
How Often Should You Change the Oil Filter?
On the other hand, the exact time for service will depend on many factors. The manufacturer’s Operation and Maintenance Manual (OMM) will be a good place to start, because it has a first suggested time based on working hours, such as every 250/500/1000 hours, and then adjust it based on the following factors, including but not limited to:
- Operating Conditions: If the machine is working in a quarry filled with dust or at a demolition site, it needs more oil filter changes than a machine working at a grassy sports field.
- Load Factor: an engine used for light-duty jobs will not accumulate garbage as rapidly as one that is always running at high RPMs under heavy load.
- Oil Type: Good synthetic oil may have a longer time between services, but lifters must also be designed for long life.
Conclusion
Mastering the oil filter replacement trick is a basic skill for any equipment owner. Such a simple, low-cost operation can significantly improve the service life of the engine. By using quality parts, the right tools, and the system processes to follow, you can proactively protect your equipment. Avoid downtime, causing unnecessary damage.


